If you are a little lost and confused about the media tab and widget system on WordPress then you are not alone. Here is a short but sweet tutorial on how to add a picture to your WordPress post and sidebar.
Adding An Image To You Post
Step One
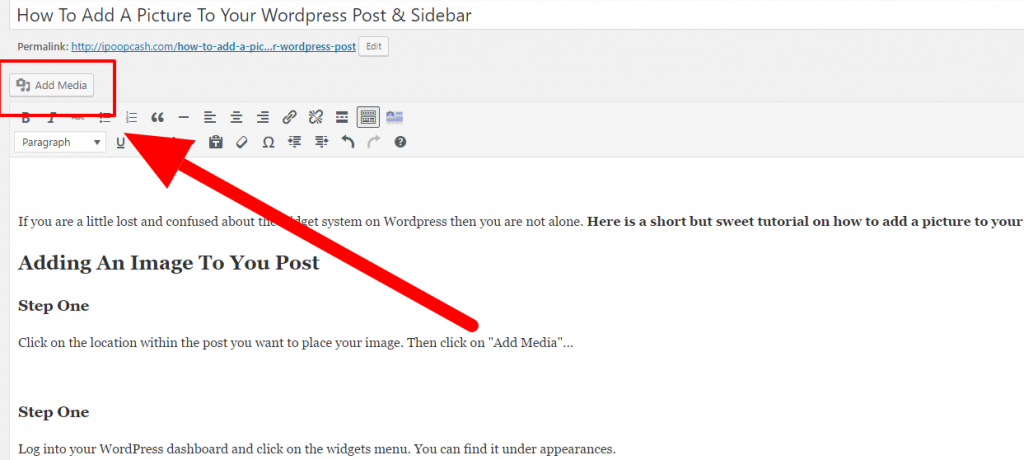
Click on the location within the post you want to place your image. Then click on “Add Media”…
Step 2
Next, you simply select the image you want to use and then choose the options you want. Alignment, image size etc. Then click on “Insert Into Post“. The image will now appear.
IMPORTANT – depending on where you wanted the image placed, it can sometimes be a bit misaligned when you preview it. This comes down to experience so start messing around a little bit. Move the picture around and change the alignment to see what happens. It’s not hard, just takes practice.
How To Add An Image Into The Side Bar On A Page
Step One
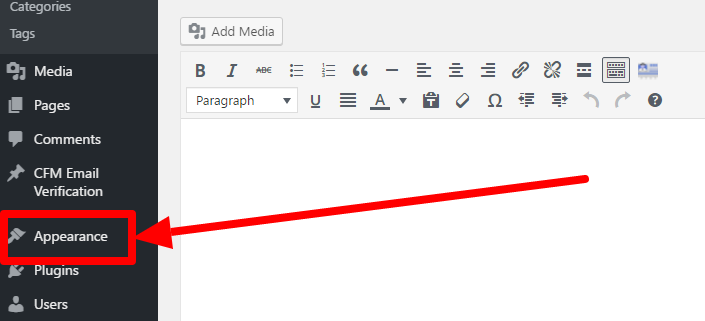
Log into your WordPress dashboard and click on the widgets menu. You can find it under appearances.
Step 2
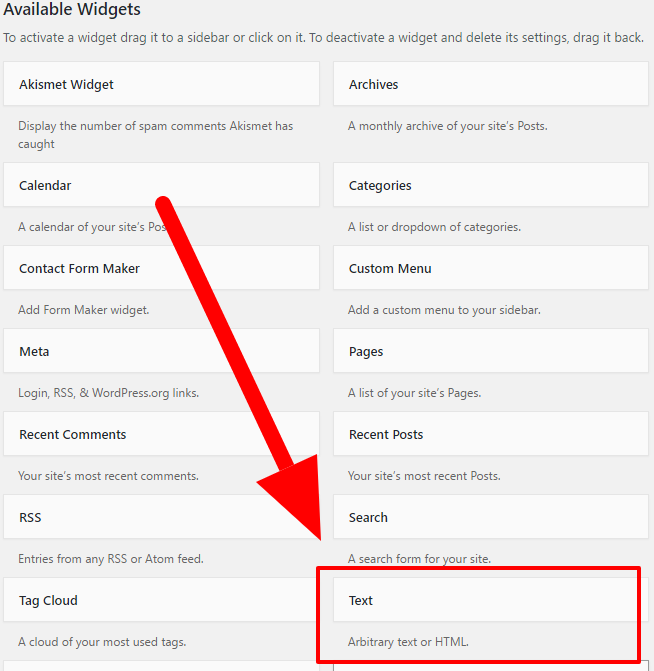
Next, you need to DRAG the “Text” widget over to wherever you want it on your sidebar slot.
Step 3
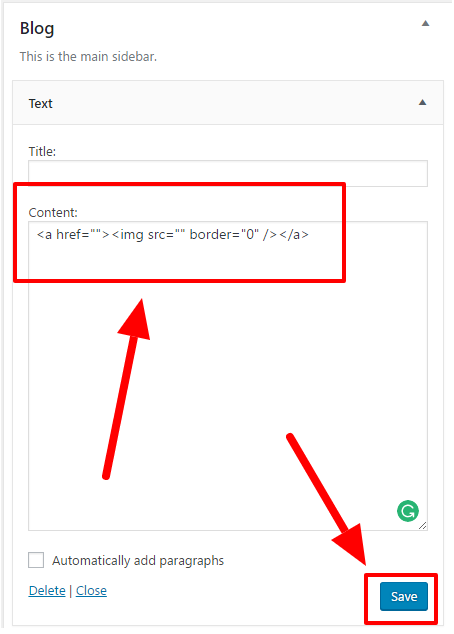
Once you have dragged your “Text” widget over you need to copy and paste the following code into the content field. This is the code which allows you to put the picture in – it identifies where the image is located on your hosting server. Copy the code below. Then paste it in, hit “Save”
<a href=””><img src=”” border=”0″ /></a>
Step 4
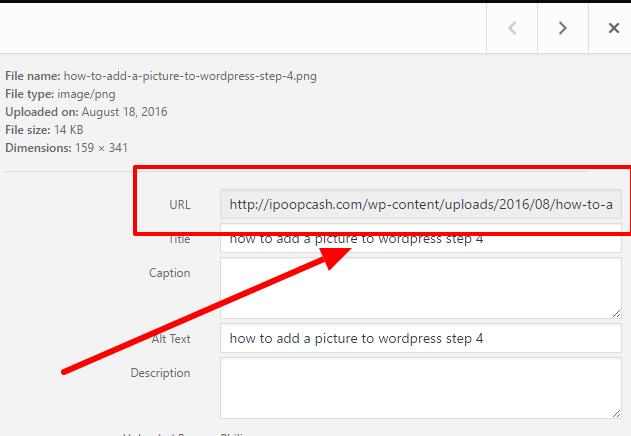
Next, click on the “Media” tab and THEN click on the image you want to add to your sidebar.

Step 5
Then, copy the URL of the image file – this is the URL you paste into the code you pasted into your “Text” widget moments ago.
Step 6
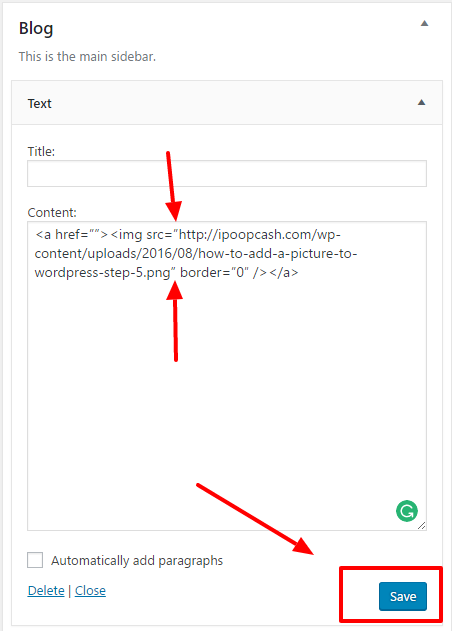
Now, go back into your widget menu and paste the image URL into the <img src=” section of the code. Make sure you paste the URL inside the two quotation marks as indicated by the arrows. Then, click on save. See image below…
Step 7
Go to your homepage and refresh the page – the image should now appear in your sidebar.
What are the other parts of the code for?
The <a href=””> is to make the image a clickable link. Same idea again, simply paste the link inside quotation marks that you wish the image to send the user too.
The border=”0″ is to create a border around the image. You can change the value from “0” to 1, 2, 3 and so to make it bigger and fatter.
CONGRATULATIONS!
You did it. Your image is now in place. Did I explain myself properly? Are there any other tutorials you would like to see?
